The most common complaint about homemade vegan pumpkin spice drinks is the pervasive “Thin & Watery Woe”—that dispiriting moment when your eagerly anticipated creamy latte turns out anemic, separating into sad layers, or tasting like spiced water rather than a rich, comforting beverage. If your concoction lacks the luscious body and consistent texture you crave, you’re not alone. This guide will dissect every common failure, from gritty sediment to collapsed foam, equipping you with precise fixes to master the perfect vegan pumpkin spice drink every single time.
What Perfect Vegan Pumpkin Spice Latte Actually Looks, Feels, and Tastes Like
Before we diagnose what goes wrong, let’s define the flawless outcome. This is your benchmark for success.
| Stage | Success marker — what you should see / feel / smell / hear |
|---|---|
| Before heating | Pumpkin mixture is smooth, bright orange, thick but pourable. Vegan milk is cold, opaque, and free from any signs of curdling. Spices are fragrant. |
| During heating | Mixture gently simmers, not boiling aggressively. Surface is smooth, steam rises steadily. No separation or scorching. Aroma is sweet and spicy, filling the kitchen. Temperature reaches 60-65°C. |
| At the finish | Uniform, creamy, light orange-brown color throughout. No sediment or separation. Smooth, velvety texture when stirred. Rich, warm aroma of pumpkin and balanced spice. |
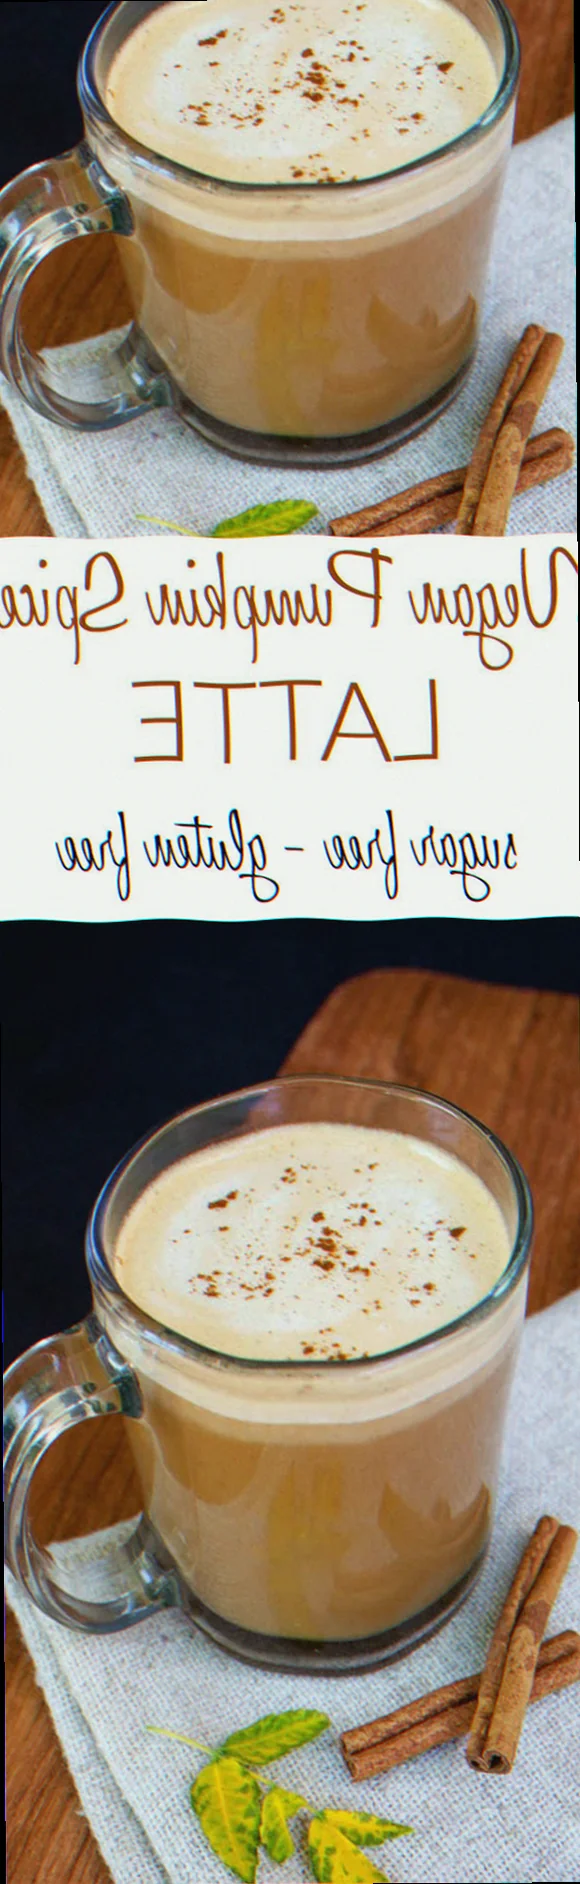
| When serving | A stable, airy layer of microfoam (approximately 1-2 cm) caps the drink, holding its shape. The liquid beneath is smooth and coats the mouth. Flavor sequence: initial sweetness, followed by warm, earthy pumpkin, finishing with a lingering, complex spice blend (cinnamon, ginger, nutmeg, clove). |
The Ingredient Failures — Wrong Choices Before You Even Start Cooking
The foundation of your drink depends entirely on the quality and type of ingredients you choose.
- “Weak Pumpkin Whimper”: caused by using pumpkin pie filling instead of pure pumpkin puree → fix: always use 100% pure canned pumpkin puree (e.g., Libby’s 100% Pure Pumpkin). Pie filling contains added sugar and spices, throwing off your flavor balance.
- “Thin & Watery Woe”: caused by using low-fat or standard non-dairy milk not designed for frothing/heating → fix: select a “barista blend” vegan milk, preferably oat milk or full-fat soy milk. These have stabilizers and higher fat content to prevent separation and provide creaminess. Ensure milk is cold (around 4°C).
- “Too Sweet, Not Spice”: caused by stale or low-quality pumpkin pie spice blend → fix: use a fresh, high-quality pumpkin pie spice blend. Check the expiry date and smell it—it should be highly aromatic. Consider grinding your own spices for maximum potency.
The Technique Failures — What Goes Wrong During Cooking
Execution matters just as much as your ingredients. These are the common pitfalls in the preparation process.
- “Gritty Sediment Syndrome”: what it looks/tastes like: tiny, undissolved particles at the bottom of your cup, or a slightly chalky texture → caused by not straining the pumpkin puree or adding dry spices directly to hot liquid → fix: after heating, pass the pumpkin mixture through a fine-mesh sieve (100-micron or finer) to remove any fibrous pumpkin bits. For spices, always whisk them thoroughly into a small amount of liquid (like the pumpkin puree or maple syrup) before adding to the main mixture, ensuring complete dispersion.
- “Separated Sadness”: symptom: your drink separates into watery and clumpy layers, especially after sitting for a few minutes → cause: overheating the vegan milk (causing it to curdle) or combining ingredients at vastly different temperatures too quickly → fix: heat your vegan milk gently over medium-low heat, stirring constantly, until it reaches 60-65°C. Never boil it. When combining the pumpkin mixture with the heated milk, slowly whisk the milk into the pumpkin mixture, rather than dumping it all at once, to temper the liquids.
- “Scorched & Bitter Bleakness”: symptom: a burnt taste, or a harsh, acrid note in the background → cause: heating ingredients, especially the pumpkin mixture or milk, too quickly on high heat without stirring, causing sugars or milk proteins to burn onto the bottom of the pan → fix: always use a heavy-bottomed saucepan over medium-low heat. Stir the pumpkin mixture continuously while it heats, ensuring it doesn’t stick. If using a microwave, heat in short 30-second bursts, stirring between each.
- “Foam Fiasco”: symptom: vegan milk either won’t foam at all, or the foam collapses almost instantly → cause: using the wrong type of vegan milk (not barista blend), milk that isn’t cold enough, or incorrect frothing technique → fix: use cold (4°C) barista-blend oat or soy milk. For a steam wand, position it just below the surface to incorporate air, then lower it for texture. For a French press, pump vigorously with cold milk until doubled in volume, then gently warm the frothed milk. Handheld frothers work best with milk heated to 60°C.
The Equipment Failures — When Your Tools Are the Problem
Sometimes, the issue isn’t you, it’s your gear.
- Fine-mesh sieve/strainer: what the wrong version causes: “Gritty Sediment Syndrome” from fibrous pumpkin or undissolved spices + what to use instead: a very fine-mesh sieve (like a chionois) or even a cheesecloth-lined strainer + why it matters: ensures a silky-smooth mouthfeel, which is critical for a high-quality latte.
- Heavy-bottomed saucepan: the failure it produces: “Scorched & Bitter Bleakness” due to uneven heating and sticking + the fix: use a stainless steel or enameled cast iron saucepan with a thick base + the workaround if unavailable: use a double boiler setup (a heatproof bowl over simmering water) to gently heat the mixture, requiring more time but preventing burning.
- Milk frother (steam wand, handheld, French press): why this specific tool exists for this dish: to create the luxurious microfoam essential for a true latte experience, preventing “Foam Fiasco” + acceptable substitute: a whisk can be used vigorously to create some foam in a heated bowl, or a tightly sealed jar shaken vigorously with cold milk before heating can also produce a rustic foam.
The Full Recipe — Built Around Preventing Every Failure Above
Here’s the perfected recipe, engineered to counteract every potential misstep.
Related topics: Applesauce vegan cupcakes recipe · Vegan curry mee recipe · Quinoa pudding recipe vegan
- 100g (approx. 1/3 cup) 100% Pure Canned Pumpkin Puree — prevents “Weak Pumpkin Whimper” and ensures authentic flavor.
- 60ml (1/4 cup) Maple Syrup — prevents “Too Sweet, Not Spice” by providing balanced sweetness; also helps disperse spices.
- 1 tsp Pumpkin Pie Spice — prevents “Too Sweet, Not Spice” (if fresh) and “Clumpy Spice Catastrophe” (when mixed properly).
- 1/2 tsp Pure Vanilla Extract — enhances overall flavor complexity.
- Pinch of Salt — balances sweetness and highlights other flavors.
- 360ml (1.5 cups) Barista-Blend Oat Milk (cold) — prevents “Thin & Watery Woe” and “Separated Sadness,” crucial for frothing.
- Optional: Vegan Whipped Cream and extra pumpkin pie spice for garnish.
Method:
- Step 1 — Combine Base: In a heavy-bottomed saucepan, whisk together the 100g pumpkin puree, 60ml maple syrup, 1 tsp pumpkin pie spice, 1/2 tsp vanilla extract, and pinch of salt. — This is where “Clumpy Spice Catastrophe” is prevented by pre-mixing dry spices into the wet ingredients. — success marker: a smooth, uniform orange paste forms with no visible spice clumps.
- Step 2 — Gentle Heating: Place the saucepan over medium-low heat. Cook, stirring constantly with a balloon whisk, for 3-5 minutes until the mixture is fragrant and gently simmering. Do not boil. — This prevents “Scorched & Bitter Bleakness” by ensuring even heat distribution. — success marker: mixture is steaming slightly, bubbles just begin to form around the edges, and the aroma is rich and inviting.
- Step 3 — Strain for Smoothness: Carefully pour the pumpkin mixture through a fine-mesh sieve set over a heatproof jug or bowl, pressing with a spoon to extract all liquid. Discard any fibrous solids. — This is where “Gritty Sediment Syndrome” happens if you skip this step — success marker: the strained liquid is perfectly smooth and vibrant orange, free of any particles.
- Step 4 — Heat Milk: In a separate saucepan (or using a steam wand), gently heat the 360ml cold barista-blend oat milk over medium-low heat until it reaches 60-65°C. — This prevents “Separated Sadness” and ensures optimal frothing. — success marker: milk is